Cold Air Intake
#1
I know what your thinking, I am thinking the same thing also. I have an 01 sebring Lxi with the 2.7L motor and I am thinking about getting a CAI not for the performance(although it cant get any worse) but to make the exhaust a little louder, more echo and more of a "growl". I couldnt find any name brand systems out there but I did find this one. Im not too sure if it will mount in the 2.7 engine bay. It says it will but after trying to decipher it I cant see how the tubing would fit. Anyone else think this will fit in the 2.7? Link below.
Link to CAI
Link to CAI
#2
Not likely to fit. The part shown was designed for the Mitsubishi engine and coupe. It will probably fit the Sebring coupe (built by Mitsubishi) but the coupe is a very different car with a very different engine from yours.
If you insist on wasting money on one of these things, at least buy one that fits.
Don't throw away your old parts. You my need 'em.
If you insist on wasting money on one of these things, at least buy one that fits.
Don't throw away your old parts. You my need 'em.
#3
That's what I thought. I know it fits the 2.4 and 3.0 but it also says it fits the 2.7. I always save the old parts. And it would be wasting money if I was trying to get hp out of it. I'm not, I want a better exhaust sound without putting a muffler on it.
#4
Okay guys, I made a CAI/RAI for my 2.7 Sebring. Ill post pics and how-to below. It doesnt add HP much(not that I can tell but its only been dyno'd before install). It does however add throttle response along with a lounder exhaust that has a bubble/growl to it. Its a nice tone that fits the car!
Now lets get into this thing!
--Parts I Used(O'Reilly Part Numbers)
1. Spectre Air Filter(9132 SPT)
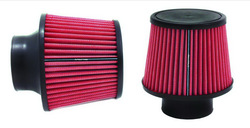
2. Spectre Air Cleaner Tube Coupler/Reducer(8871 SPT)
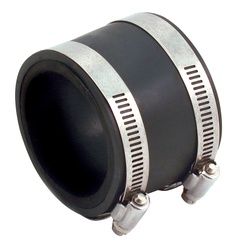
3. Spectre Hose Clamp/Bolt Clamp(8703 SPT)
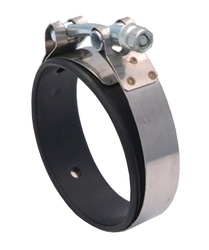
4. Spectre Air Intake Mounting Bracket(8701 SPT)
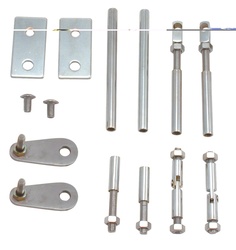
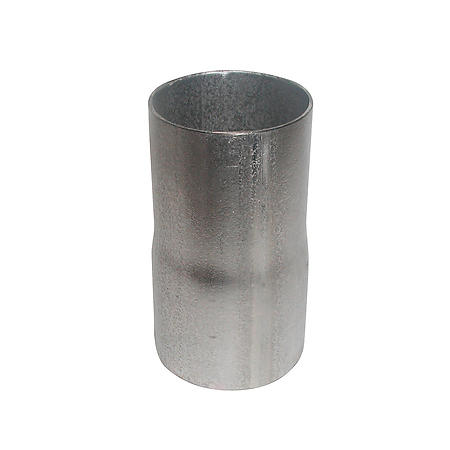
5. Exhaust Connecting Adapter 3" ID to 3" OD(548581 ROL)
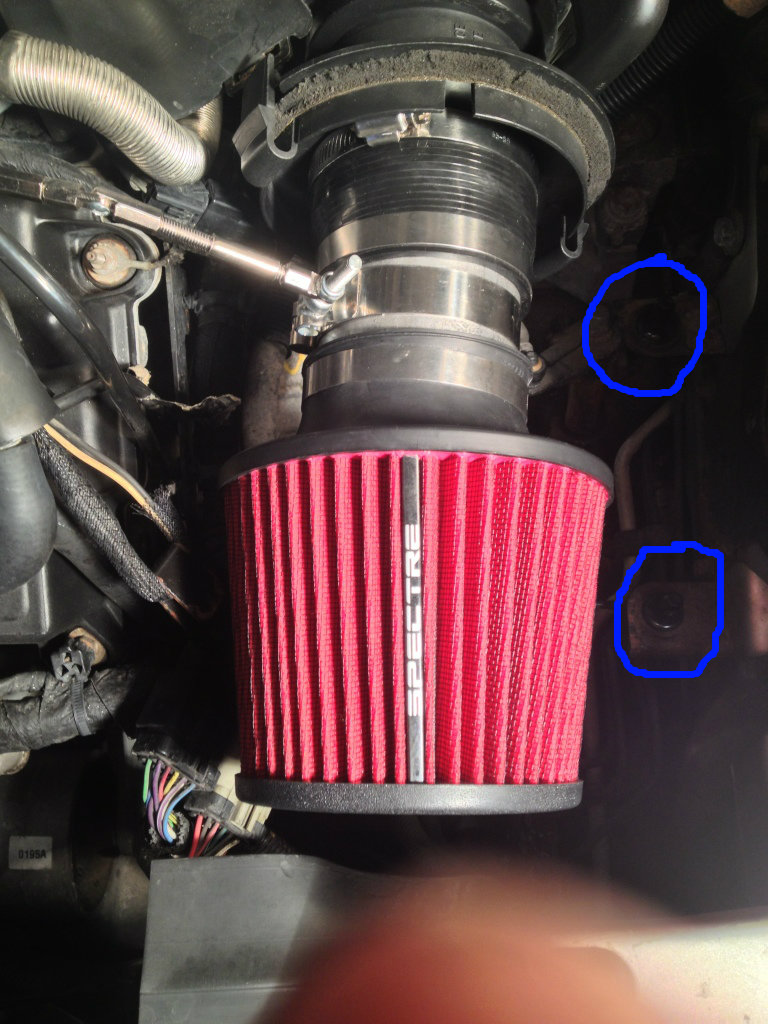
First, Get that old ribbed filter box off. There is one screw on top that you have to take off and there are posts that it attaches to on the bottom. There are 2 clips securing the tube in the back of the box as well. Push the tabs towards the tube and pull the tube out of the box. Slide the filter off the tube and into the box. When this is done, the only thing securing the box will be the 2 posts circled in blue. Pull the box straight up and wiggle it slightly. With a little force, it will come out.
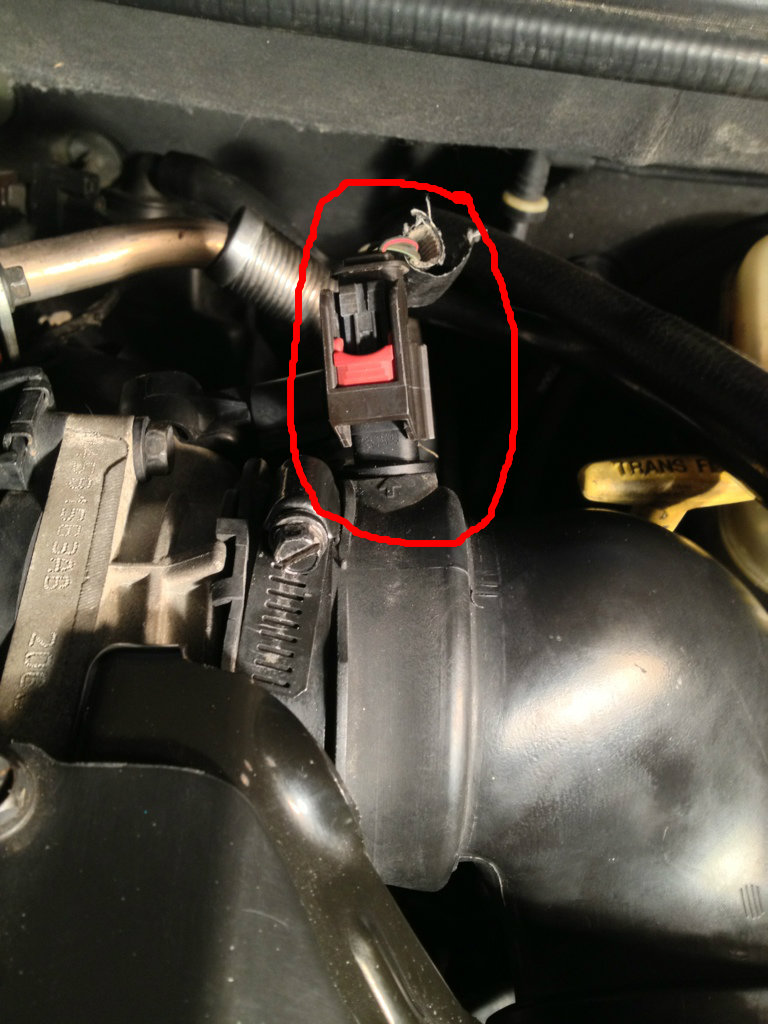
Circled in red there, is the IAT (Intake Air Temperature) sensor, I believe. It may be the MAF (Mass Air Flow) sensor, but either way, it's gonna have to come out. Gently pull the entire sensor straight up and out of the rubber tube. I also got some Mass Air Flow Sensor Cleaner and cleaned it while this was off, it was pretty nasty. Do not disconnect it, do not wiggle it. If you break it, it might be a little costly to replace. Just pull the entire sensor gently out. After you get that out, loosen the tube from the throttle body with a flat screwdriver on the clamp that it is connected with.
Next, disconnect this rubber hose from the tube as shown in red. It should just pull right off. Pull the tube out of the engine bay, disconnecting it from the throttle body. This will make it easier to connect the filter.

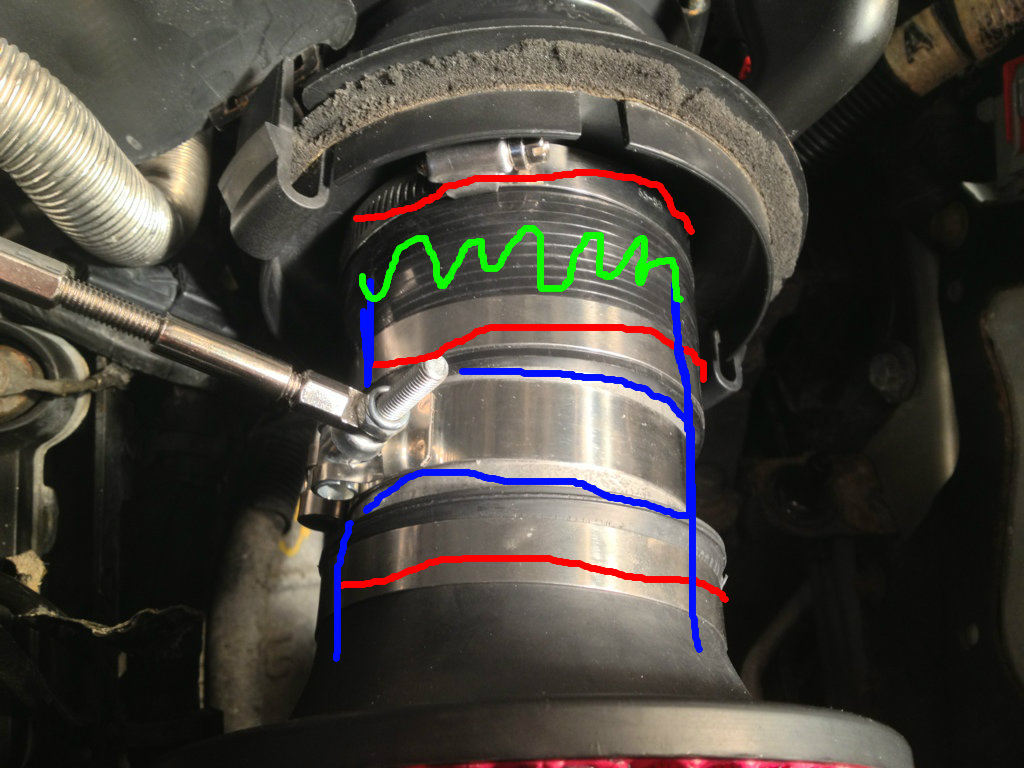
I used the 3"-3" connector piece(Green). It is TOUGH to get on, but with some muscle and effort, you can get it attached. I heated it up under hot/warm water for about 5 minutes. Make sure you take some 80 grit sandpaper or something to dull out the lip of the exhaust piece(Blue) or it will scar the adapter. It will still be tricky after heating up and might take another hand but it will go on. After I got it on the exhaust piece I went back to warmed it up again and slipped it onto the intake tube and clamped it down there with the clamps(Red) it came with. Getting it onto the intake tube will be the hardest part of this! Make sure your clamps are strong.
Now for the filter. the exhaust piece slipped right into the filter, not nearly as tricky as getting the adapter onto the tube. I had an extra hose clamp laying around and you will need that to clamp it down. Regular and Color pic included.
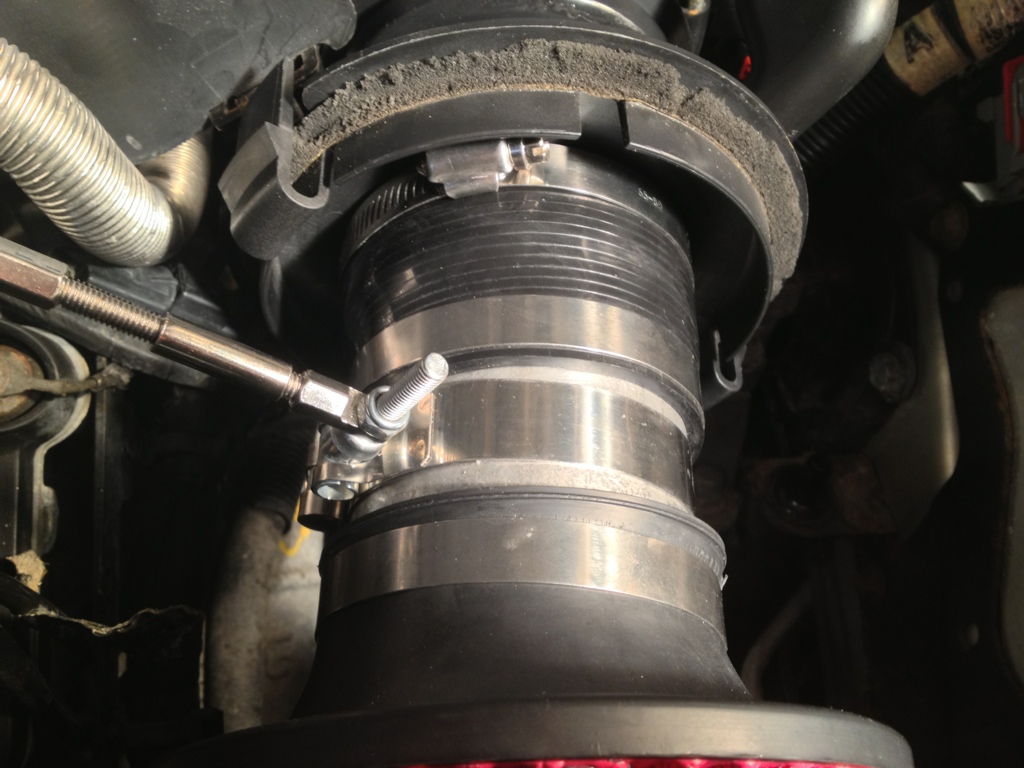
Now you will need to secure it somehow. I used the special bolt clamp on the exhaust piece and the intake bracket kit to secure it to a bolt on the intake manifold. Im not sure how to put this part into words except put the bolt clamp on the exhaust and follow the picture to get the bracket kit to match. it will take some adjusting and if I remember correctly you will have to take some of the threaded pieces and fit them into other adapters and things.
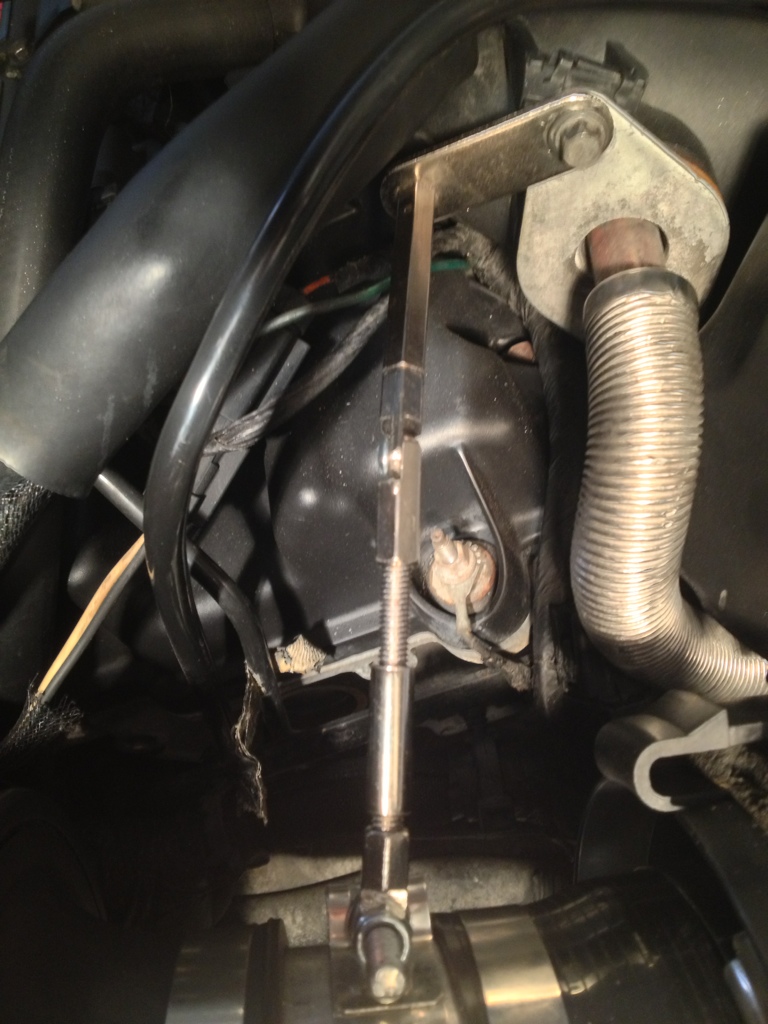
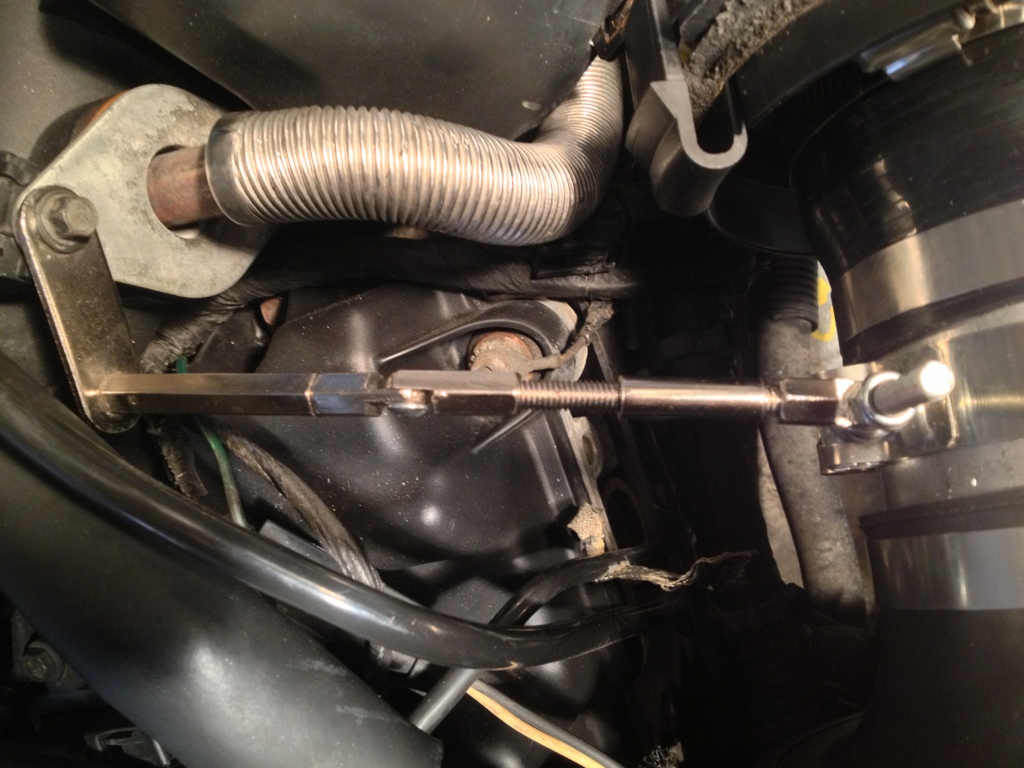
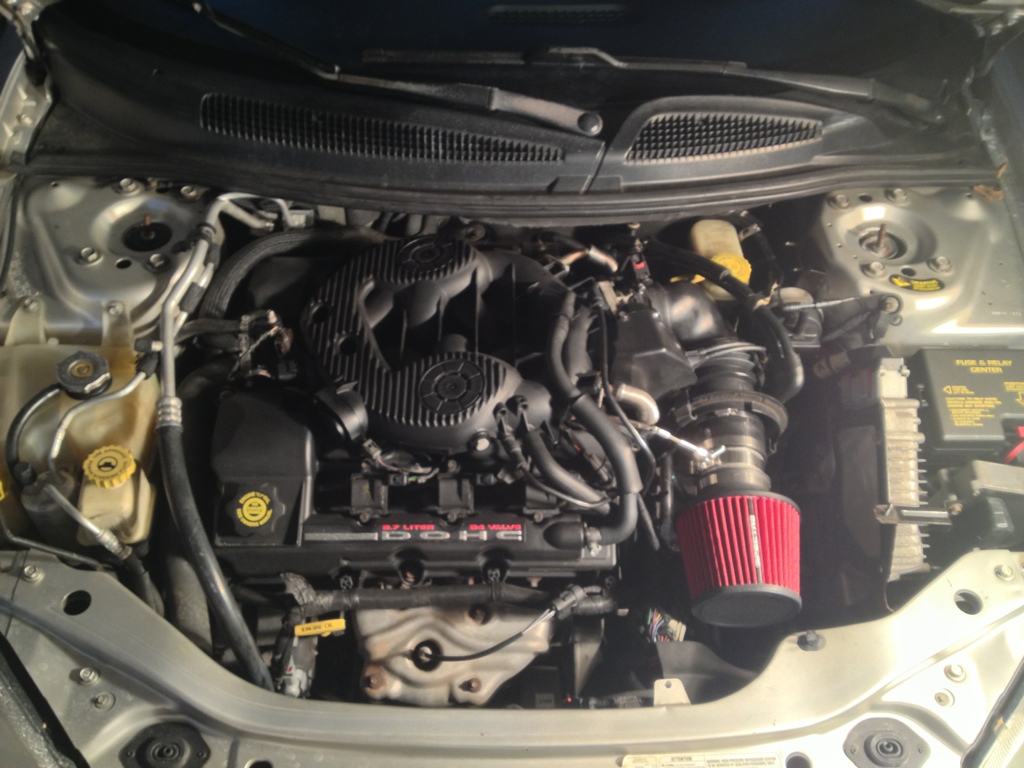
After you bolt it down, put the IAT sensor in, I found that if you start one side slightly then push it will go on*I am NOT responsible for broken sensors or any damages that may have occured. I have not had any problems and you should not either.* Then clamp the intake tube back to the throttle body, re-attach the rubber hose to the intake boot. Tighten up the bracket and fire it up for a test run. It should look like this if everything went smooth!
Now lets get into this thing!
--Parts I Used(O'Reilly Part Numbers)
1. Spectre Air Filter(9132 SPT)

2. Spectre Air Cleaner Tube Coupler/Reducer(8871 SPT)

3. Spectre Hose Clamp/Bolt Clamp(8703 SPT)

4. Spectre Air Intake Mounting Bracket(8701 SPT)

5. Exhaust Connecting Adapter 3" ID to 3" OD(548581 ROL)

First, Get that old ribbed filter box off. There is one screw on top that you have to take off and there are posts that it attaches to on the bottom. There are 2 clips securing the tube in the back of the box as well. Push the tabs towards the tube and pull the tube out of the box. Slide the filter off the tube and into the box. When this is done, the only thing securing the box will be the 2 posts circled in blue. Pull the box straight up and wiggle it slightly. With a little force, it will come out.

Circled in red there, is the IAT (Intake Air Temperature) sensor, I believe. It may be the MAF (Mass Air Flow) sensor, but either way, it's gonna have to come out. Gently pull the entire sensor straight up and out of the rubber tube. I also got some Mass Air Flow Sensor Cleaner and cleaned it while this was off, it was pretty nasty. Do not disconnect it, do not wiggle it. If you break it, it might be a little costly to replace. Just pull the entire sensor gently out. After you get that out, loosen the tube from the throttle body with a flat screwdriver on the clamp that it is connected with.

Next, disconnect this rubber hose from the tube as shown in red. It should just pull right off. Pull the tube out of the engine bay, disconnecting it from the throttle body. This will make it easier to connect the filter.

I used the 3"-3" connector piece(Green). It is TOUGH to get on, but with some muscle and effort, you can get it attached. I heated it up under hot/warm water for about 5 minutes. Make sure you take some 80 grit sandpaper or something to dull out the lip of the exhaust piece(Blue) or it will scar the adapter. It will still be tricky after heating up and might take another hand but it will go on. After I got it on the exhaust piece I went back to warmed it up again and slipped it onto the intake tube and clamped it down there with the clamps(Red) it came with. Getting it onto the intake tube will be the hardest part of this! Make sure your clamps are strong.
Now for the filter. the exhaust piece slipped right into the filter, not nearly as tricky as getting the adapter onto the tube. I had an extra hose clamp laying around and you will need that to clamp it down. Regular and Color pic included.


Now you will need to secure it somehow. I used the special bolt clamp on the exhaust piece and the intake bracket kit to secure it to a bolt on the intake manifold. Im not sure how to put this part into words except put the bolt clamp on the exhaust and follow the picture to get the bracket kit to match. it will take some adjusting and if I remember correctly you will have to take some of the threaded pieces and fit them into other adapters and things.


After you bolt it down, put the IAT sensor in, I found that if you start one side slightly then push it will go on*I am NOT responsible for broken sensors or any damages that may have occured. I have not had any problems and you should not either.* Then clamp the intake tube back to the throttle body, re-attach the rubber hose to the intake boot. Tighten up the bracket and fire it up for a test run. It should look like this if everything went smooth!

Thread
Thread Starter
Forum
Replies
Last Post
advans
Archive - For Sale / Trade Classifieds
1
12-26-2006 11:45 PM


